Customers & Accounts
Create customer records, manage billing and credit terms, configure negotiated rates and invite customers to your unique booking URL and customer portal.
Customers → Add customer → Billing and payment terms → Save → Pricing → Invite to portal
Open Customers
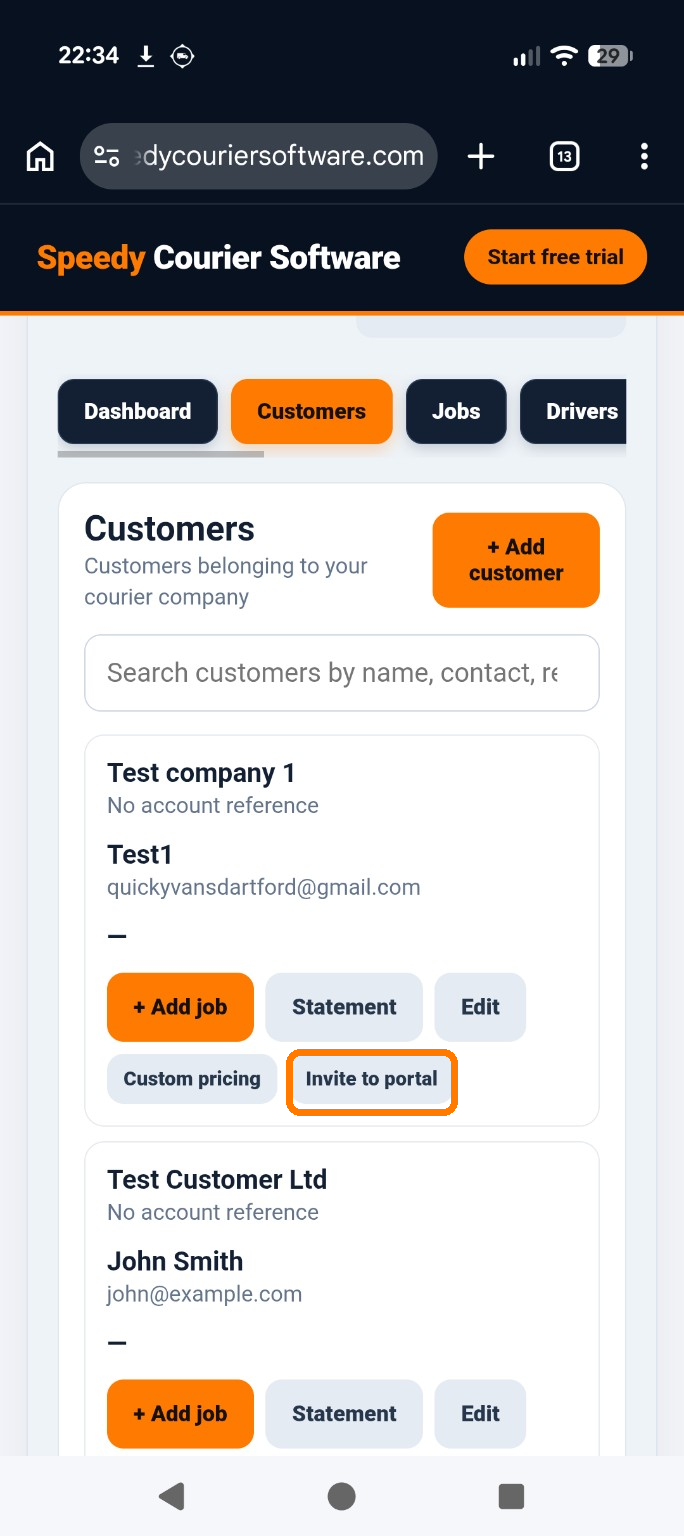
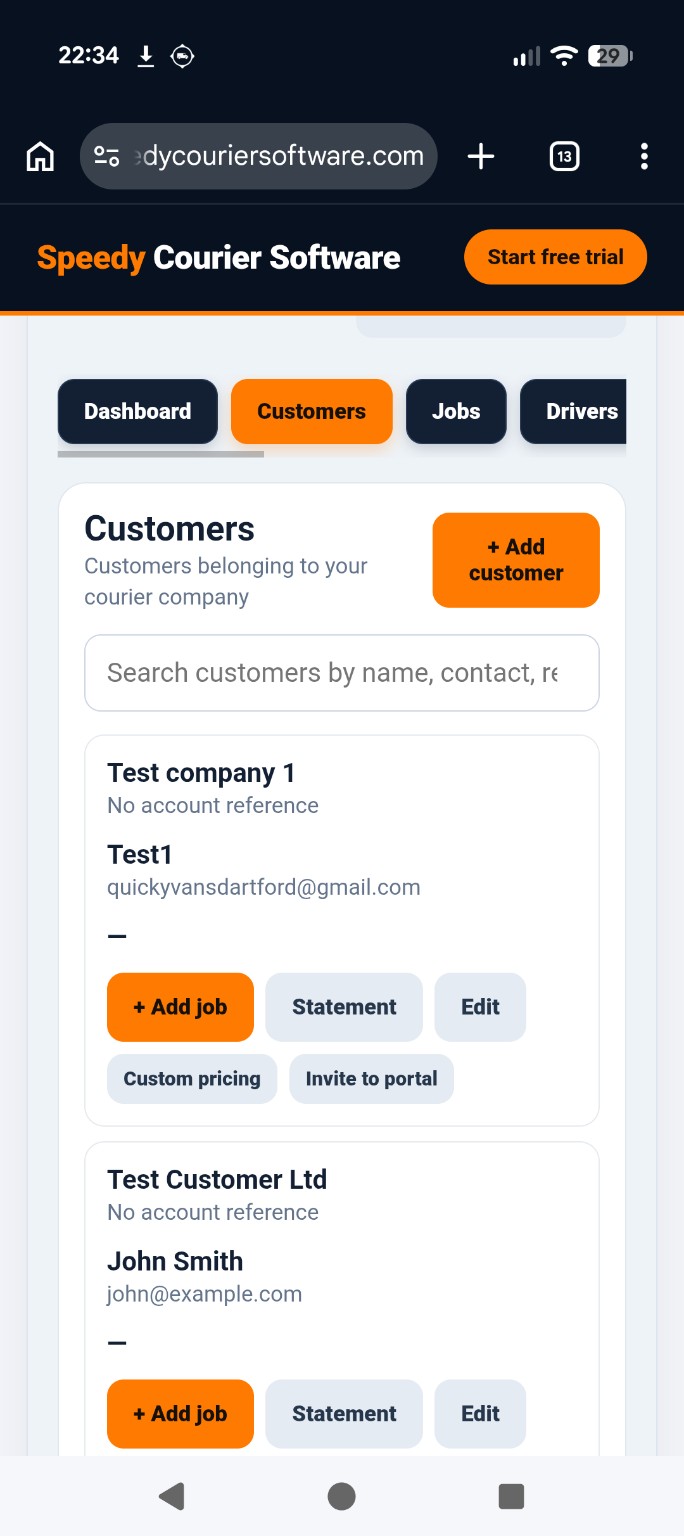
In the Office dashboard, select Customers. Search by customer name, contact or reference, or select + Add customer to create a new record. Each customer card includes shortcuts for adding a job, viewing a statement, editing details, managing custom pricing and inviting the customer to the portal.
Enter the customer details
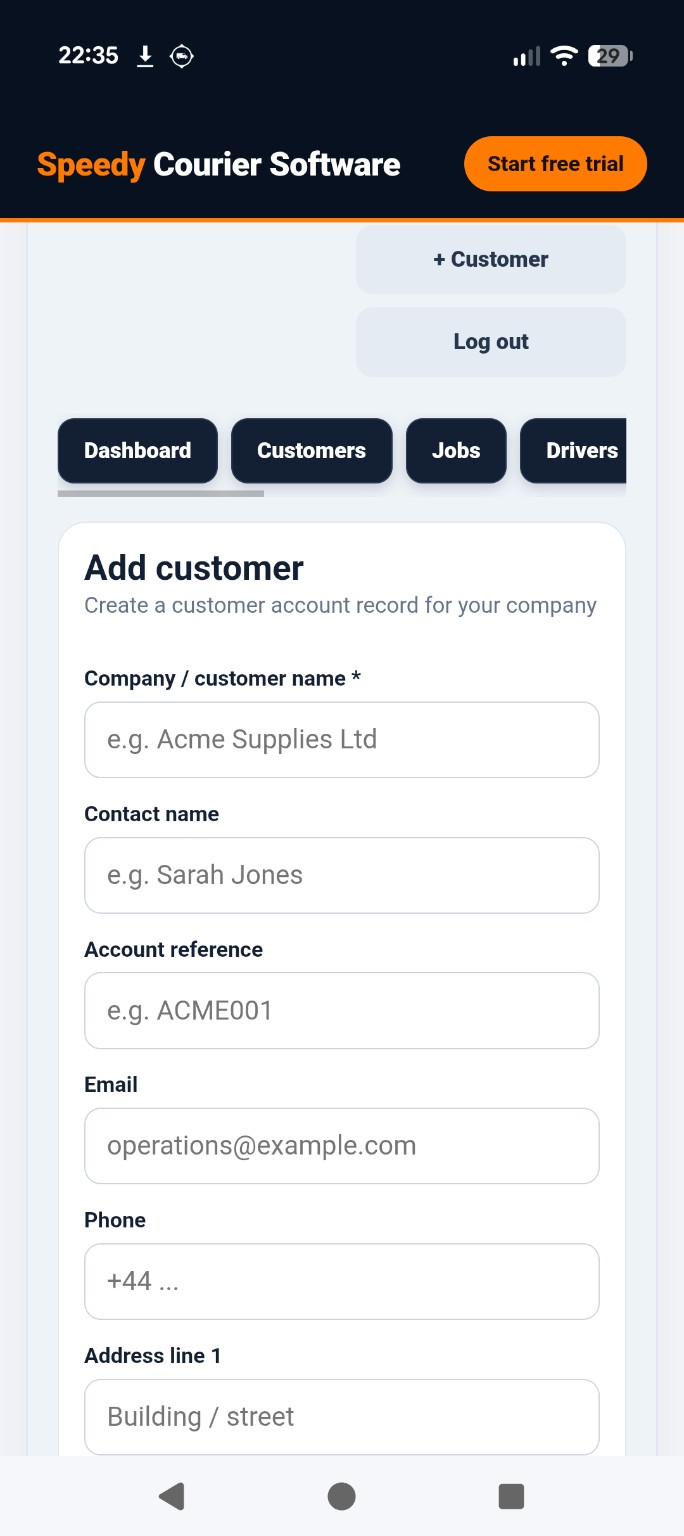
Select + Add customer. Enter the required Company / customer name, then add the contact name, account reference, email, telephone and address information as appropriate. The account reference helps you identify the customer internally.
Set billing and credit terms
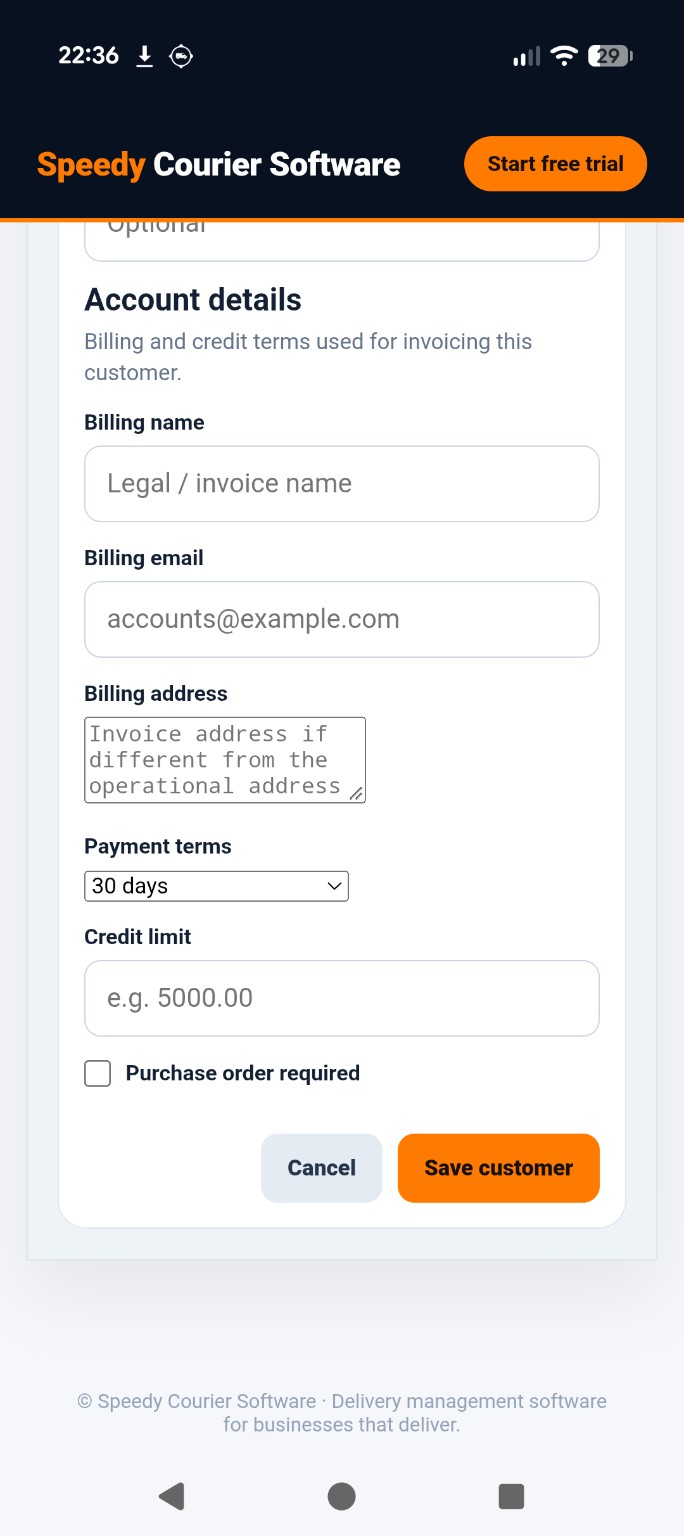
Under Account details, enter the billing name, billing email and invoice address if it differs from the operational address. Choose payment terms, enter a credit limit if applicable and tick Purchase order required when needed. Select Save customer to store the record.
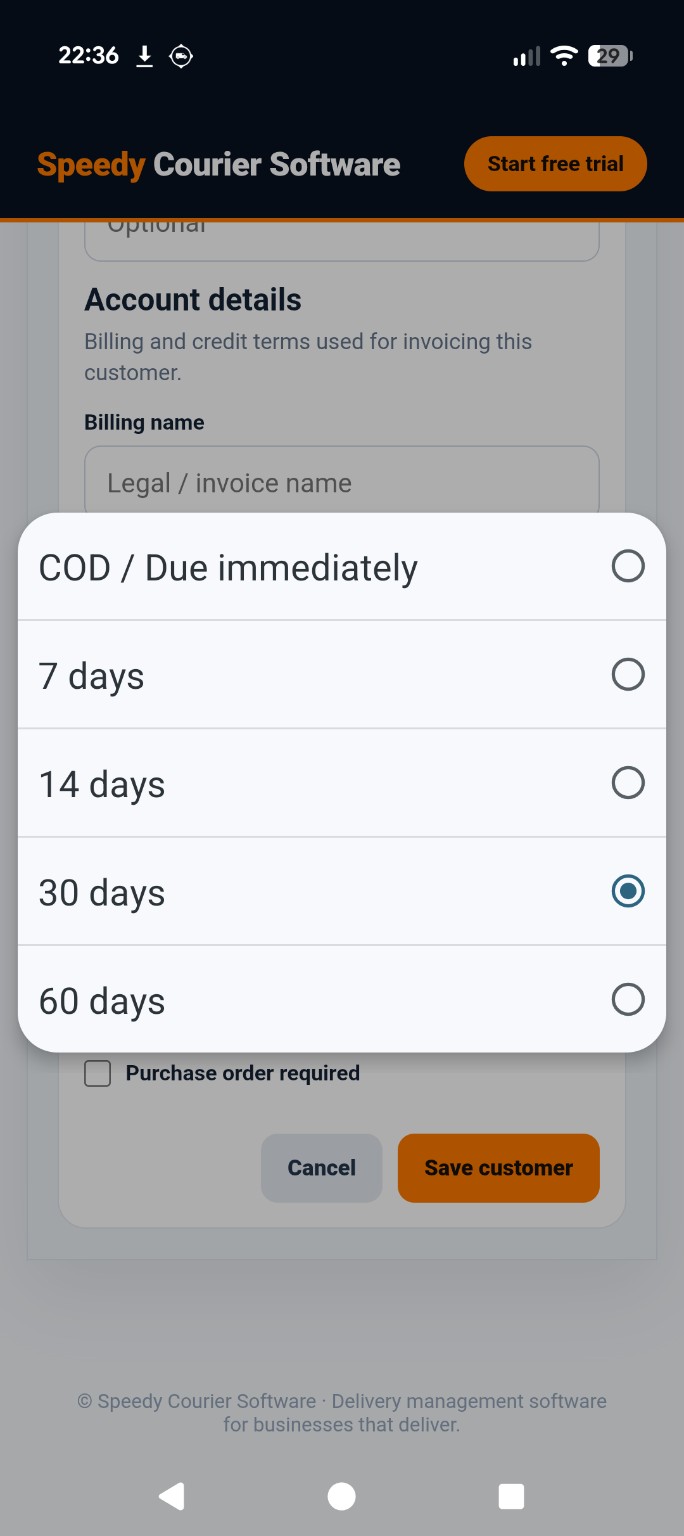
Edit an existing customer
Return to Customers and select Edit on the relevant customer card. Review and change the customer or billing information, then save your changes. This uses the customer details form shown above.
Choose default or custom pricing
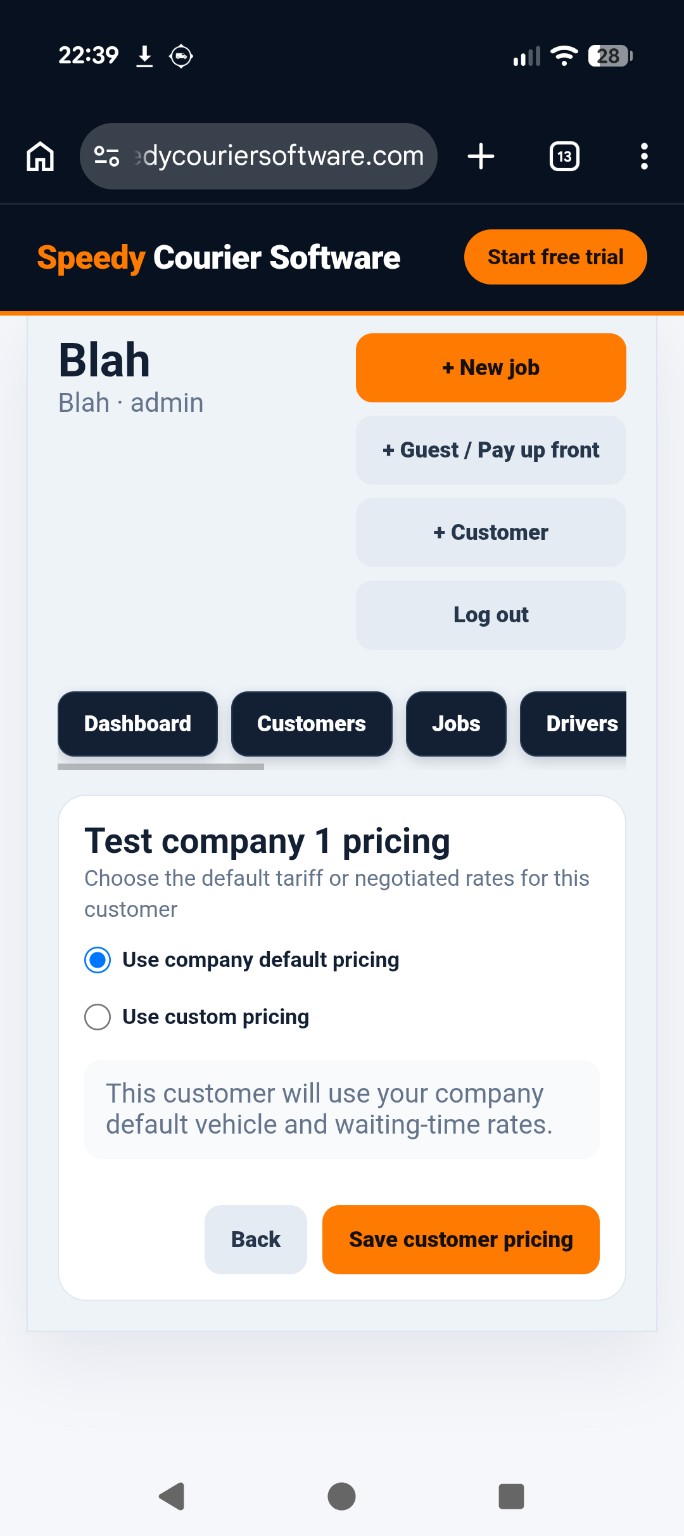
Select Custom pricing on the customer card. Choose Use company default pricing to apply your standard vehicle and waiting-time rates, or Use custom pricing for negotiated customer-specific charges. Select Save customer pricing to confirm your choice.
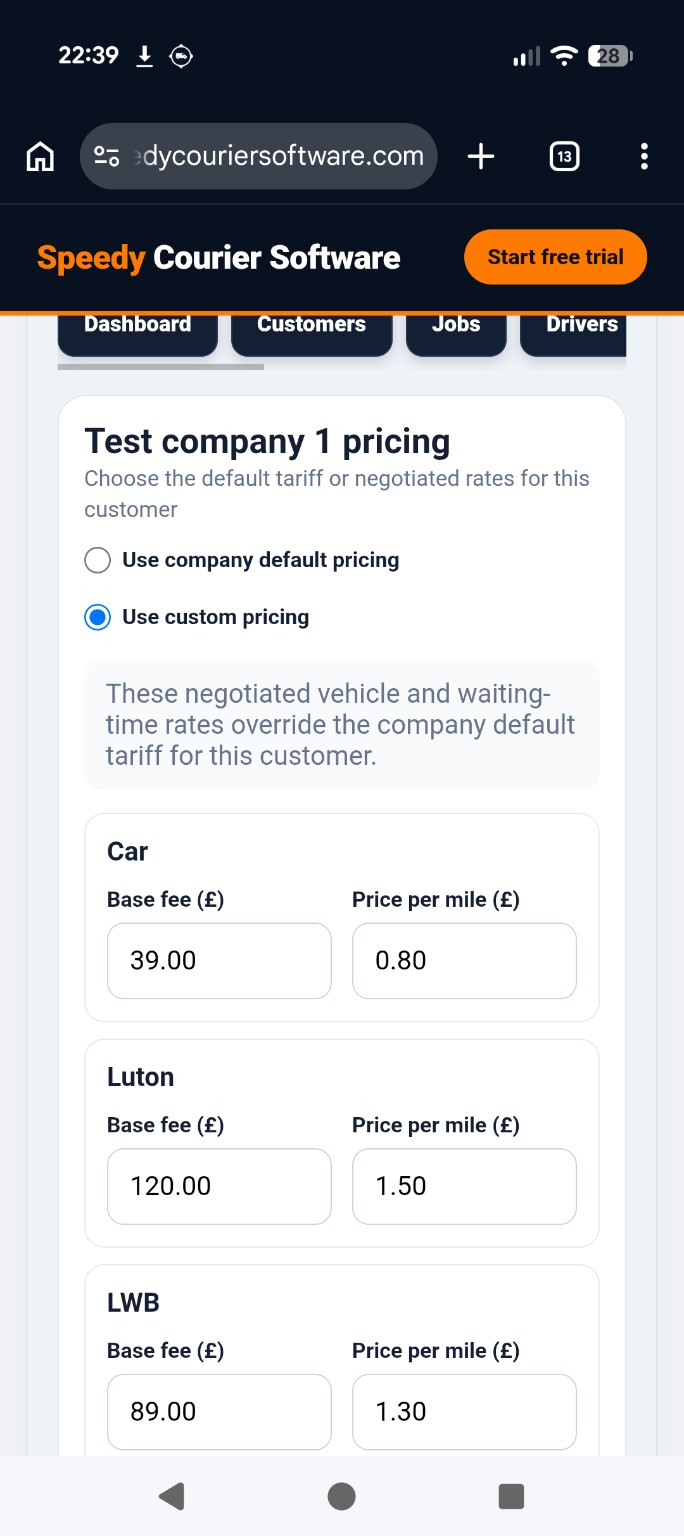
Enter negotiated vehicle rates
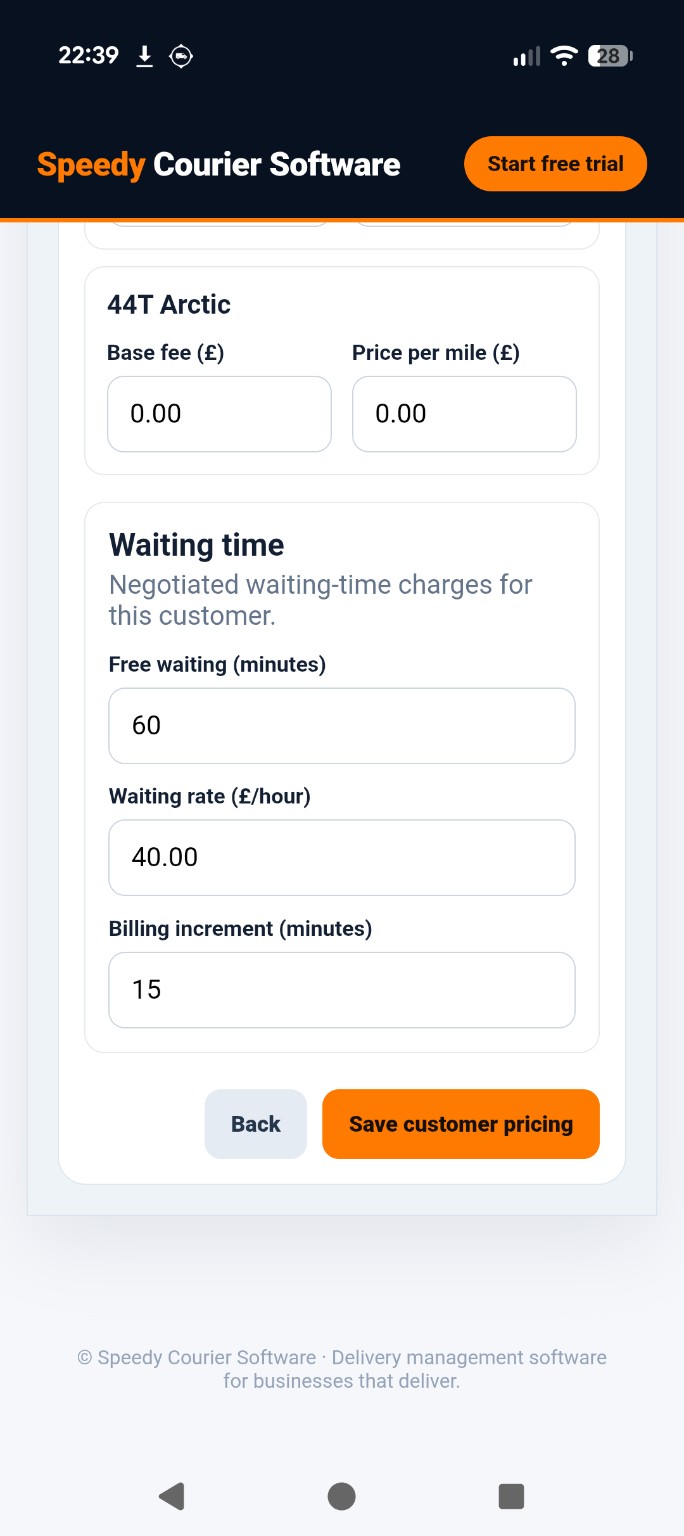
With Use custom pricing selected, enter the Base fee (£) and Price per mile (£) for each applicable vehicle type. These rates override the company default tariff for this customer. Check every relevant vehicle type before saving.
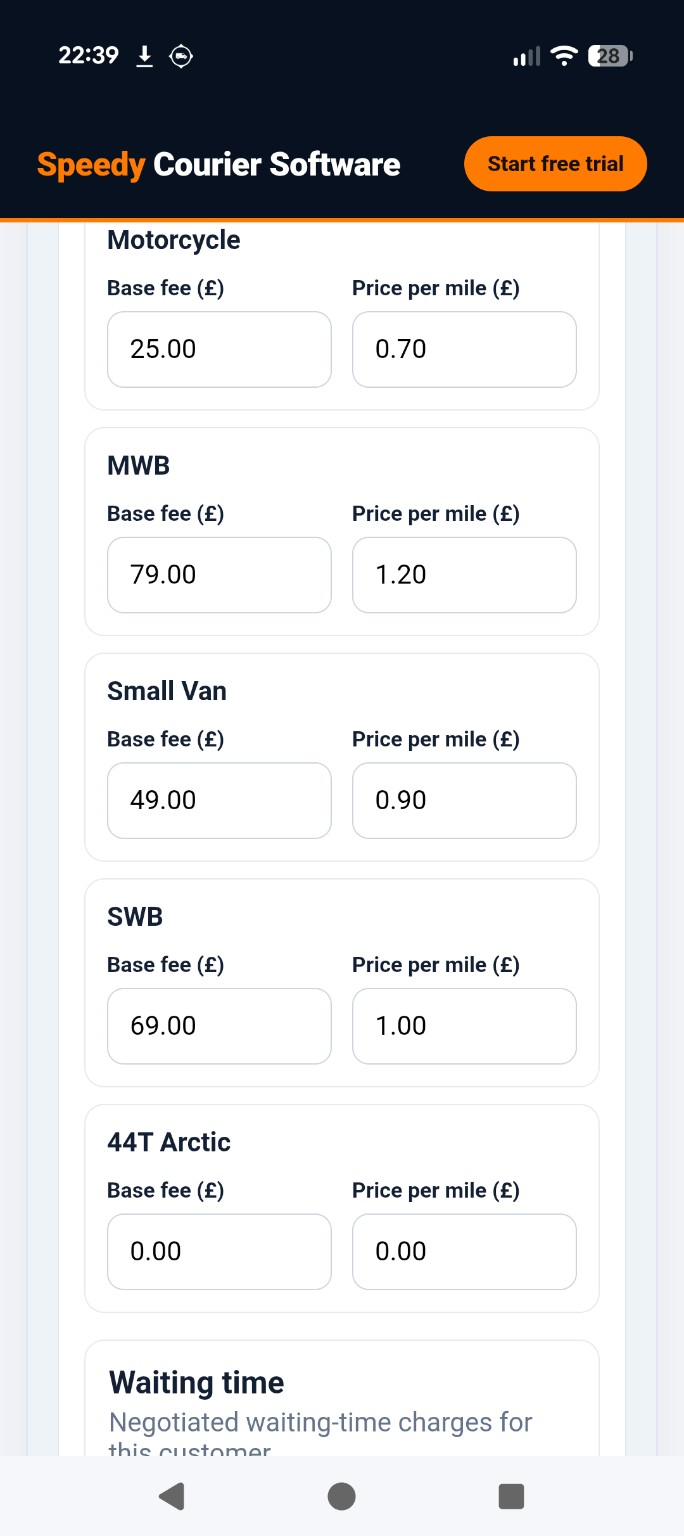
Configure waiting-time charges
In the custom pricing form, set Free waiting (minutes), Waiting rate (£/hour) and Billing increment (minutes). Select Save customer pricing when finished.
Invite a customer to the unified booking portal
On the customer card, select Invite to portal. Speedy sends an email that takes the customer to your courier company's unique /book/ page. New portal users can complete account setup there; existing portal users can use the same route to recover access.
Once logged in, the customer uses the same page to create bookings with their saved pricing, view active and completed jobs, access invoices and statements, and contact your courier company. Check that the customer email address is correct before sending or resending the invitation.